Building your micro-websites
This page focuses on how to use the micro-website editor and the concrete actions needed to create, customize, evolve, and improve your pages so they become engaging for your consumers.
Accessing the micro-website editor and starting your build
Section titled “Accessing the micro-website editor and starting your build”You can access the micro-website editor directly from your QRanberi dashboard:
- To create a new micro-website: Click the “Create a micro-website” button.
- To edit an existing micro-website: Select the micro-website you want from your list of creations.
When you start building a new micro-website, you will be invited to choose your starting point:
- From a template: This is the fastest way to begin. Choose a predefined model such as “Product,” “Recipe,” or “Event,” then customize it with your own content. For more details on selecting and applying templates, see How do I choose a starter template?.
- From scratch: If you prefer to build your micro-website entirely yourself, choose this option to start with a blank page and add the sections and elements you want.
How can I get an overview of the interface?
Section titled “How can I get an overview of the interface?”Once inside the editor, take a moment to get familiar with its main areas so you can navigate easily and start creating or editing your micro-website:
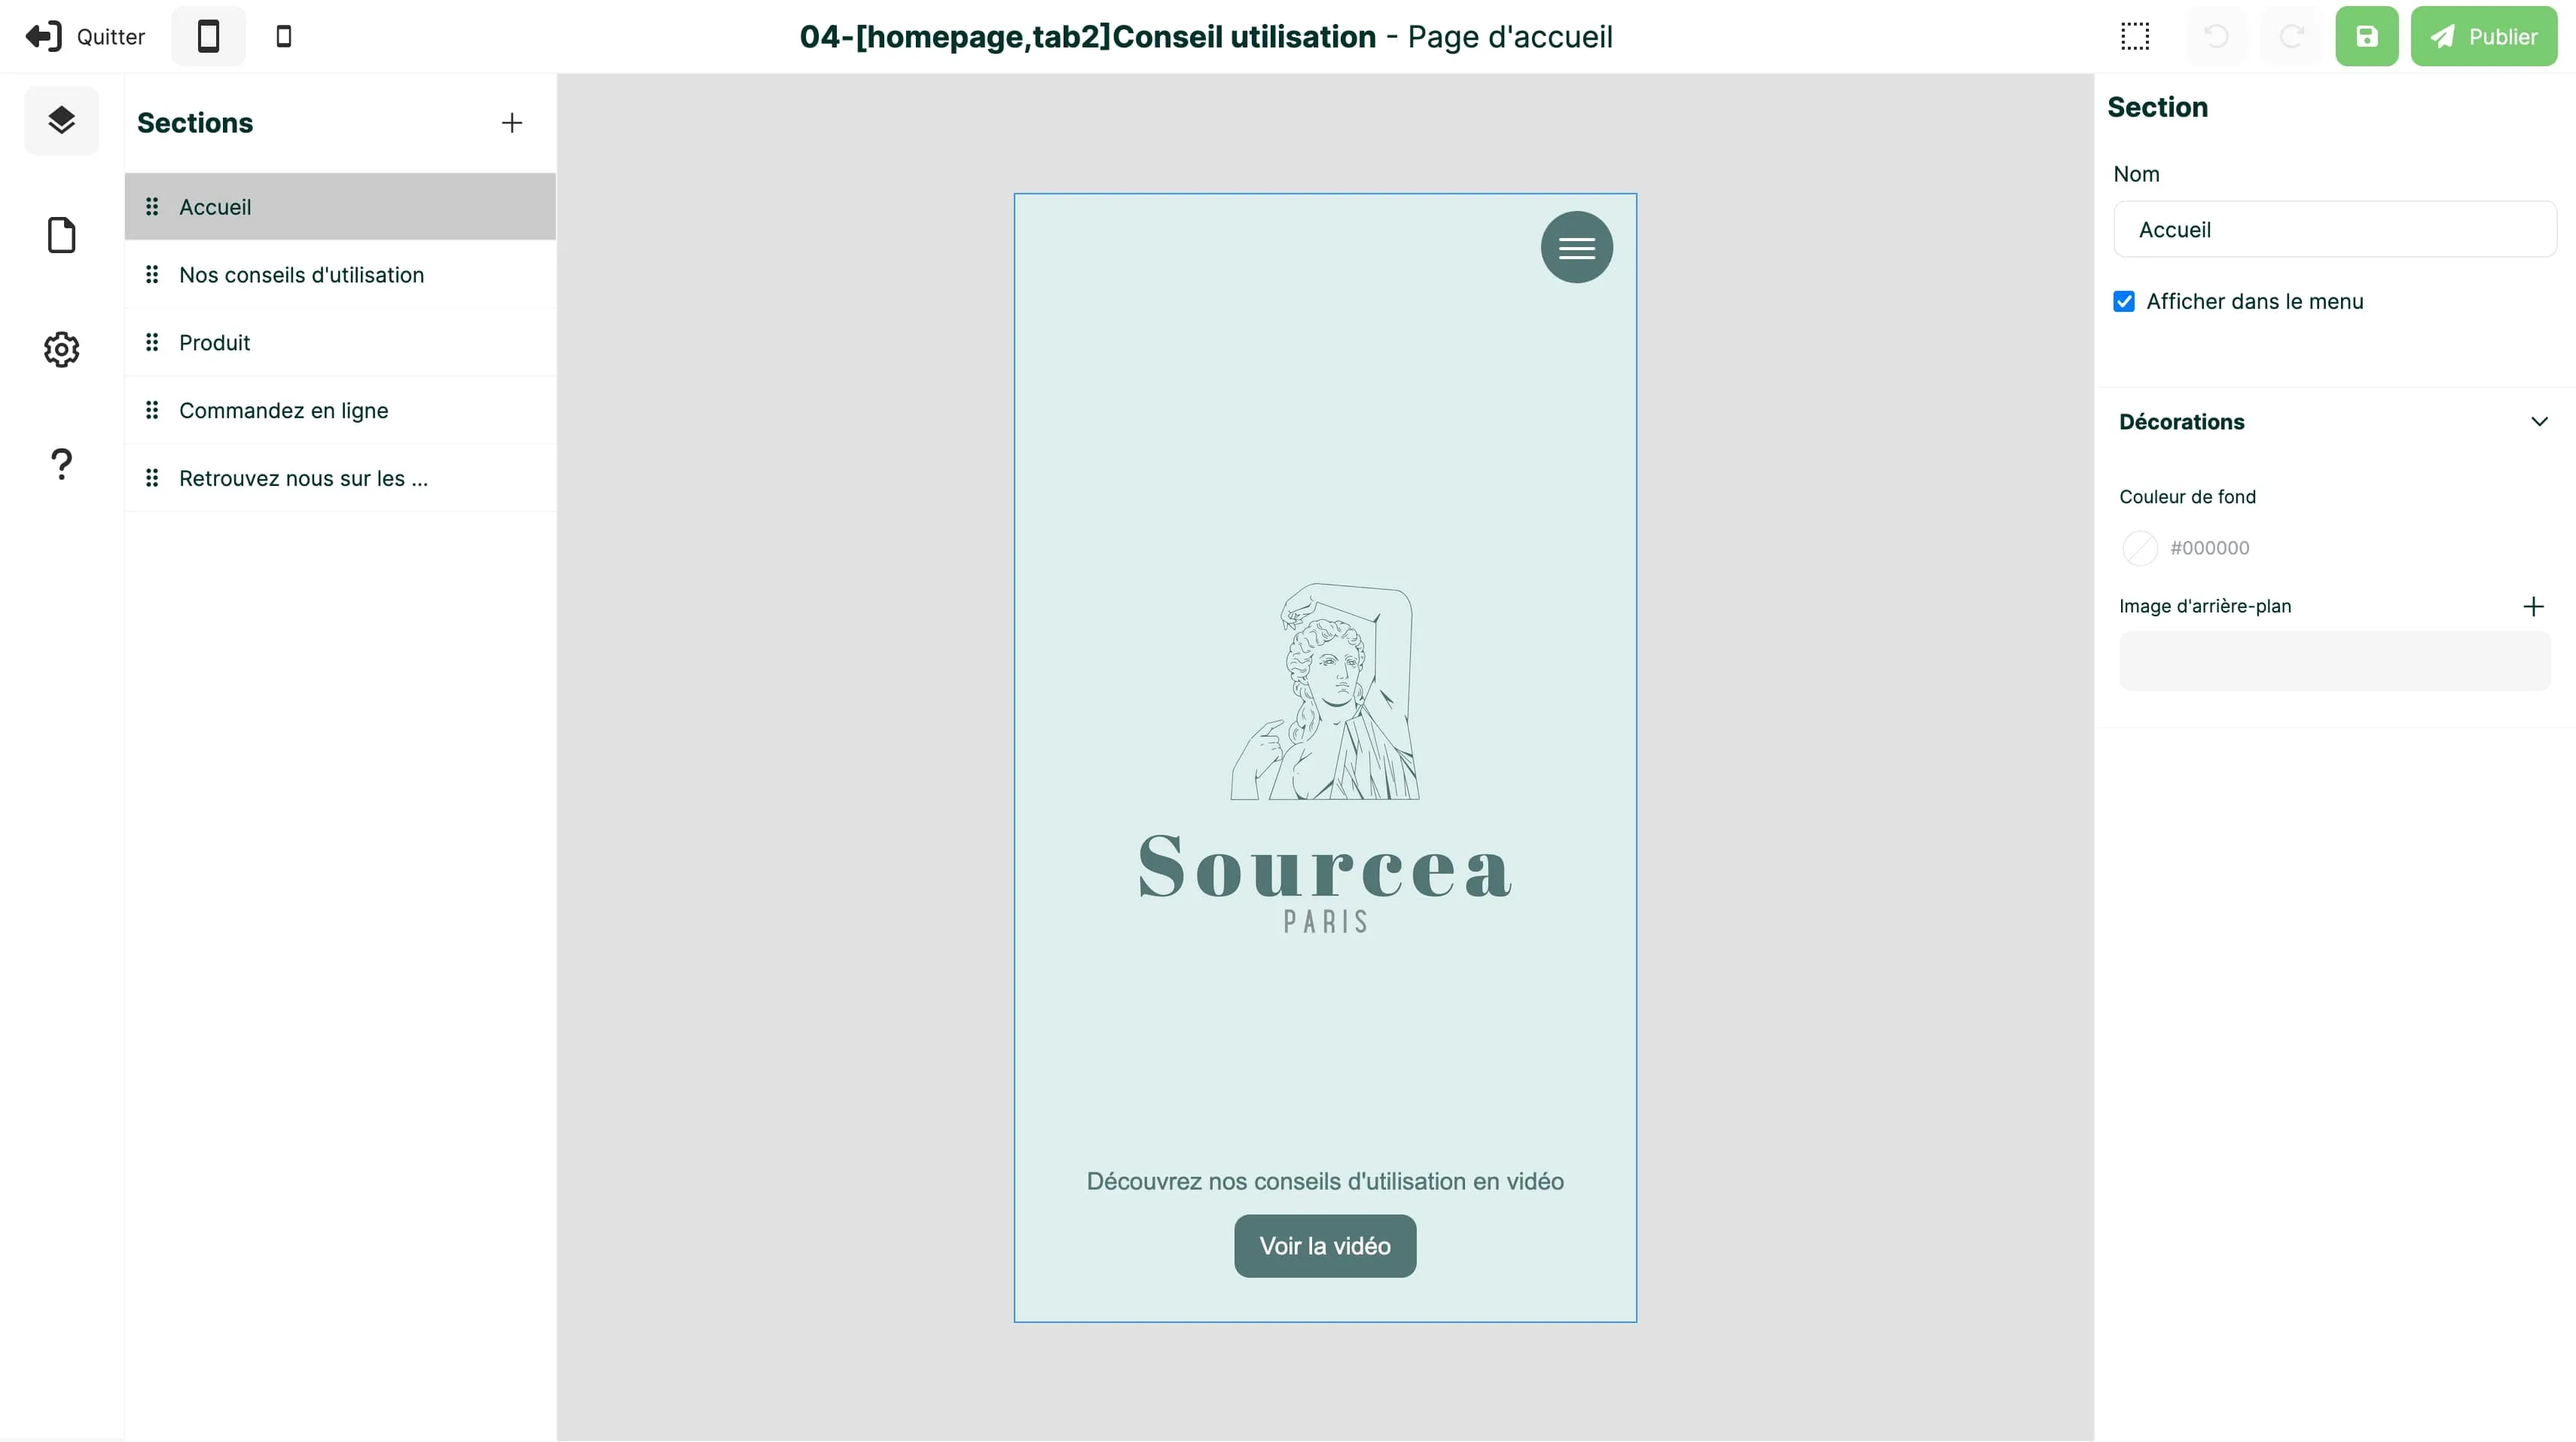
a. Side navigation bar on the left
Section titled “a. Side navigation bar on the left”This bar gives you access to the main settings and tools:
- “Global style” (gear icon): Define the overall design settings for your micro-website, including text, buttons, and titles.
- “Pages”: Manage your page structure by selecting the page to edit or adding and deleting pages. By default, your micro-website always includes a home page.
- “Sections”: Manage the content of the selected page by adding, removing, reordering, hiding, or duplicating sections.
- “Help”: Access the help center directly whenever you have a question.
b. Properties panel on the right
Section titled “b. Properties panel on the right”This panel displays the properties of the section or element selected in the main workspace. It lets you configure its attributes and style options. The available options vary depending on the selected element type, whether it is a section, image, text block, and so on.
c. Main workspace in the center
Section titled “c. Main workspace in the center”This is the area where you directly preview and edit your page content.
- Click the ”+” button to add new elements.
- Select an existing element to access its properties in the panel on the right.
- Once an element is selected, icons let you:
- Move it
- Delete it
- Duplicate it
- Save it as a reusable component template
d. Top navigation bar
Section titled “d. Top navigation bar”- Left side: Lets you leave the editor and switch between mobile preview sizes to view your site on different devices.
- Right side: Includes options to:
- Enable the selection area visualization
- Undo an action
- Save your micro-website in addition to auto-save
- Publish your micro-website to make it visible

How do I start building my micro-website?
Section titled “How do I start building my micro-website?”Once inside the editor, we recommend first adjusting the global style settings of your micro-website through the "Global style" section in the left sidebar. This helps you quickly align colors and typography with your brand guidelines.
If you are wondering about your content or creation strategy, take a look at Managing your micro-websites - Creation and content.
To start building, select an existing section from your template or add a new section from the “Sections” panel on the left, then begin adding elements inside that section.
Adding and managing elements
Section titled “Adding and managing elements”How do I add and customize elements inside a section of my micro-website?
Section titled “How do I add and customize elements inside a section of my micro-website?”To work efficiently on a section:
- Configure its properties in the properties panel on the right.
- Add new components by clicking the ”+” icon.
- Configure the properties of your components using the properties panel on the right.
- Add your content: images, text, videos, and more.
Do not forget to save and publish your work regularly so you can preview the changes.
How do I add an element such as text, an image, or a video?
Section titled “How do I add an element such as text, an image, or a video?”You add a new element through the ”+” icon. This icon is available when creating a new section, as well as above and below each existing element on your page.
Click the ”+” icon to open a window with three component tabs:
- Standards: Basic elements such as text, image, or button.
- Templates: Predefined content blocks.
- My components: Your saved custom blocks for reuse.
Choose the component you want and it will be added to your page immediately.
How do I delete an element?
Section titled “How do I delete an element?”- Select the element you want to edit by clicking it in the main workspace.
- A blue contextual menu appears next to the selected element.
- To delete it: Click the trash icon in that menu. The element will be permanently removed from your page.
How do I move or reorder elements on my page?
Section titled “How do I move or reorder elements on my page?”To move or reorder elements on your page:
- Select the element by clicking it.
- In the blue contextual menu that appears, click and hold the move icon.
- Drag and drop the element to the location you want on the page.
How do I duplicate an existing element or content block?
Section titled “How do I duplicate an existing element or content block?”To quickly duplicate an element or a content block:
- Click the element you want to duplicate on your page.
- In the blue contextual menu that appears, click the duplicate icon.
- An exact copy of the element will be added just below the original and will be ready to edit.
How do I use my custom components or saved blocks?
Section titled “How do I use my custom components or saved blocks?”Custom components let you reuse content blocks you have created and saved across all the micro-websites in your domain.
a. Save a custom component:
- Select the element or group of elements you want to save. You can group them in a container if needed.
- In the blue contextual menu, click the save icon. Your component will be saved.
b. Use a custom component:
- When you want to add a new element by clicking the ”+” icon, open the “My components” tab in the add window.
- Your custom components will be listed there and ready to be inserted into your page.
How do I add links from an element and embed a video on my page?
Section titled “How do I add links from an element and embed a video on my page?”QRanberi gives you several ways to make your micro-website more interactive:
a. Add a clickable link from an element such as a button, text block, or image: You can attach links to buttons, images, and text blocks to make navigation easier or provide access to additional information.
To add a link:
- Select the element you want to link in the main workspace.
- In the properties panel on the right, look for the section dedicated to links. It may be called “Link,” “Destination,” or “Action.”
- Choose the type of link you want and enter the required information:
- External URL link: Enter the full web address, for example
https://www.my-external-site.com. This is ideal for linking to your main website, an e-commerce page, or a blog article. - To a section: Select a specific section on the current page. This is useful for internal anchors.
- To another page: Choose another page of your micro-website to create smooth internal navigation.
- Email link: Opens the visitor’s email client with a pre-filled address.
- External URL link: Enter the full web address, for example
b. Embed a video directly on your page: You can display YouTube or Vimeo videos directly on your micro-website, without sending users elsewhere.
To embed a video:
- Add a “Video” element to your page through the ”+” icon.
- In the properties panel on the right, select the source platform, either YouTube or Vimeo.
- Enter the corresponding video ID only. This is the unique string at the end of the video’s URL. Do not paste the full URL. The video will then appear directly on your micro-website and be ready to play.
How do I customize the style of an element or a section?
Section titled “How do I customize the style of an element or a section?”QRanberi offers many options to help you bring your brand identity into your micro-website. Style customization can happen at two levels:
a. Global style of the micro-website: To define the overall design settings applied across your whole micro-website:
- In the editor’s left menu, click “Global style”.
- There you can define:
- Text settings such as default fonts, sizes, and colors
- Button settings such as shapes, colors, and default effects
- Title settings such as default fonts, sizes, and colors
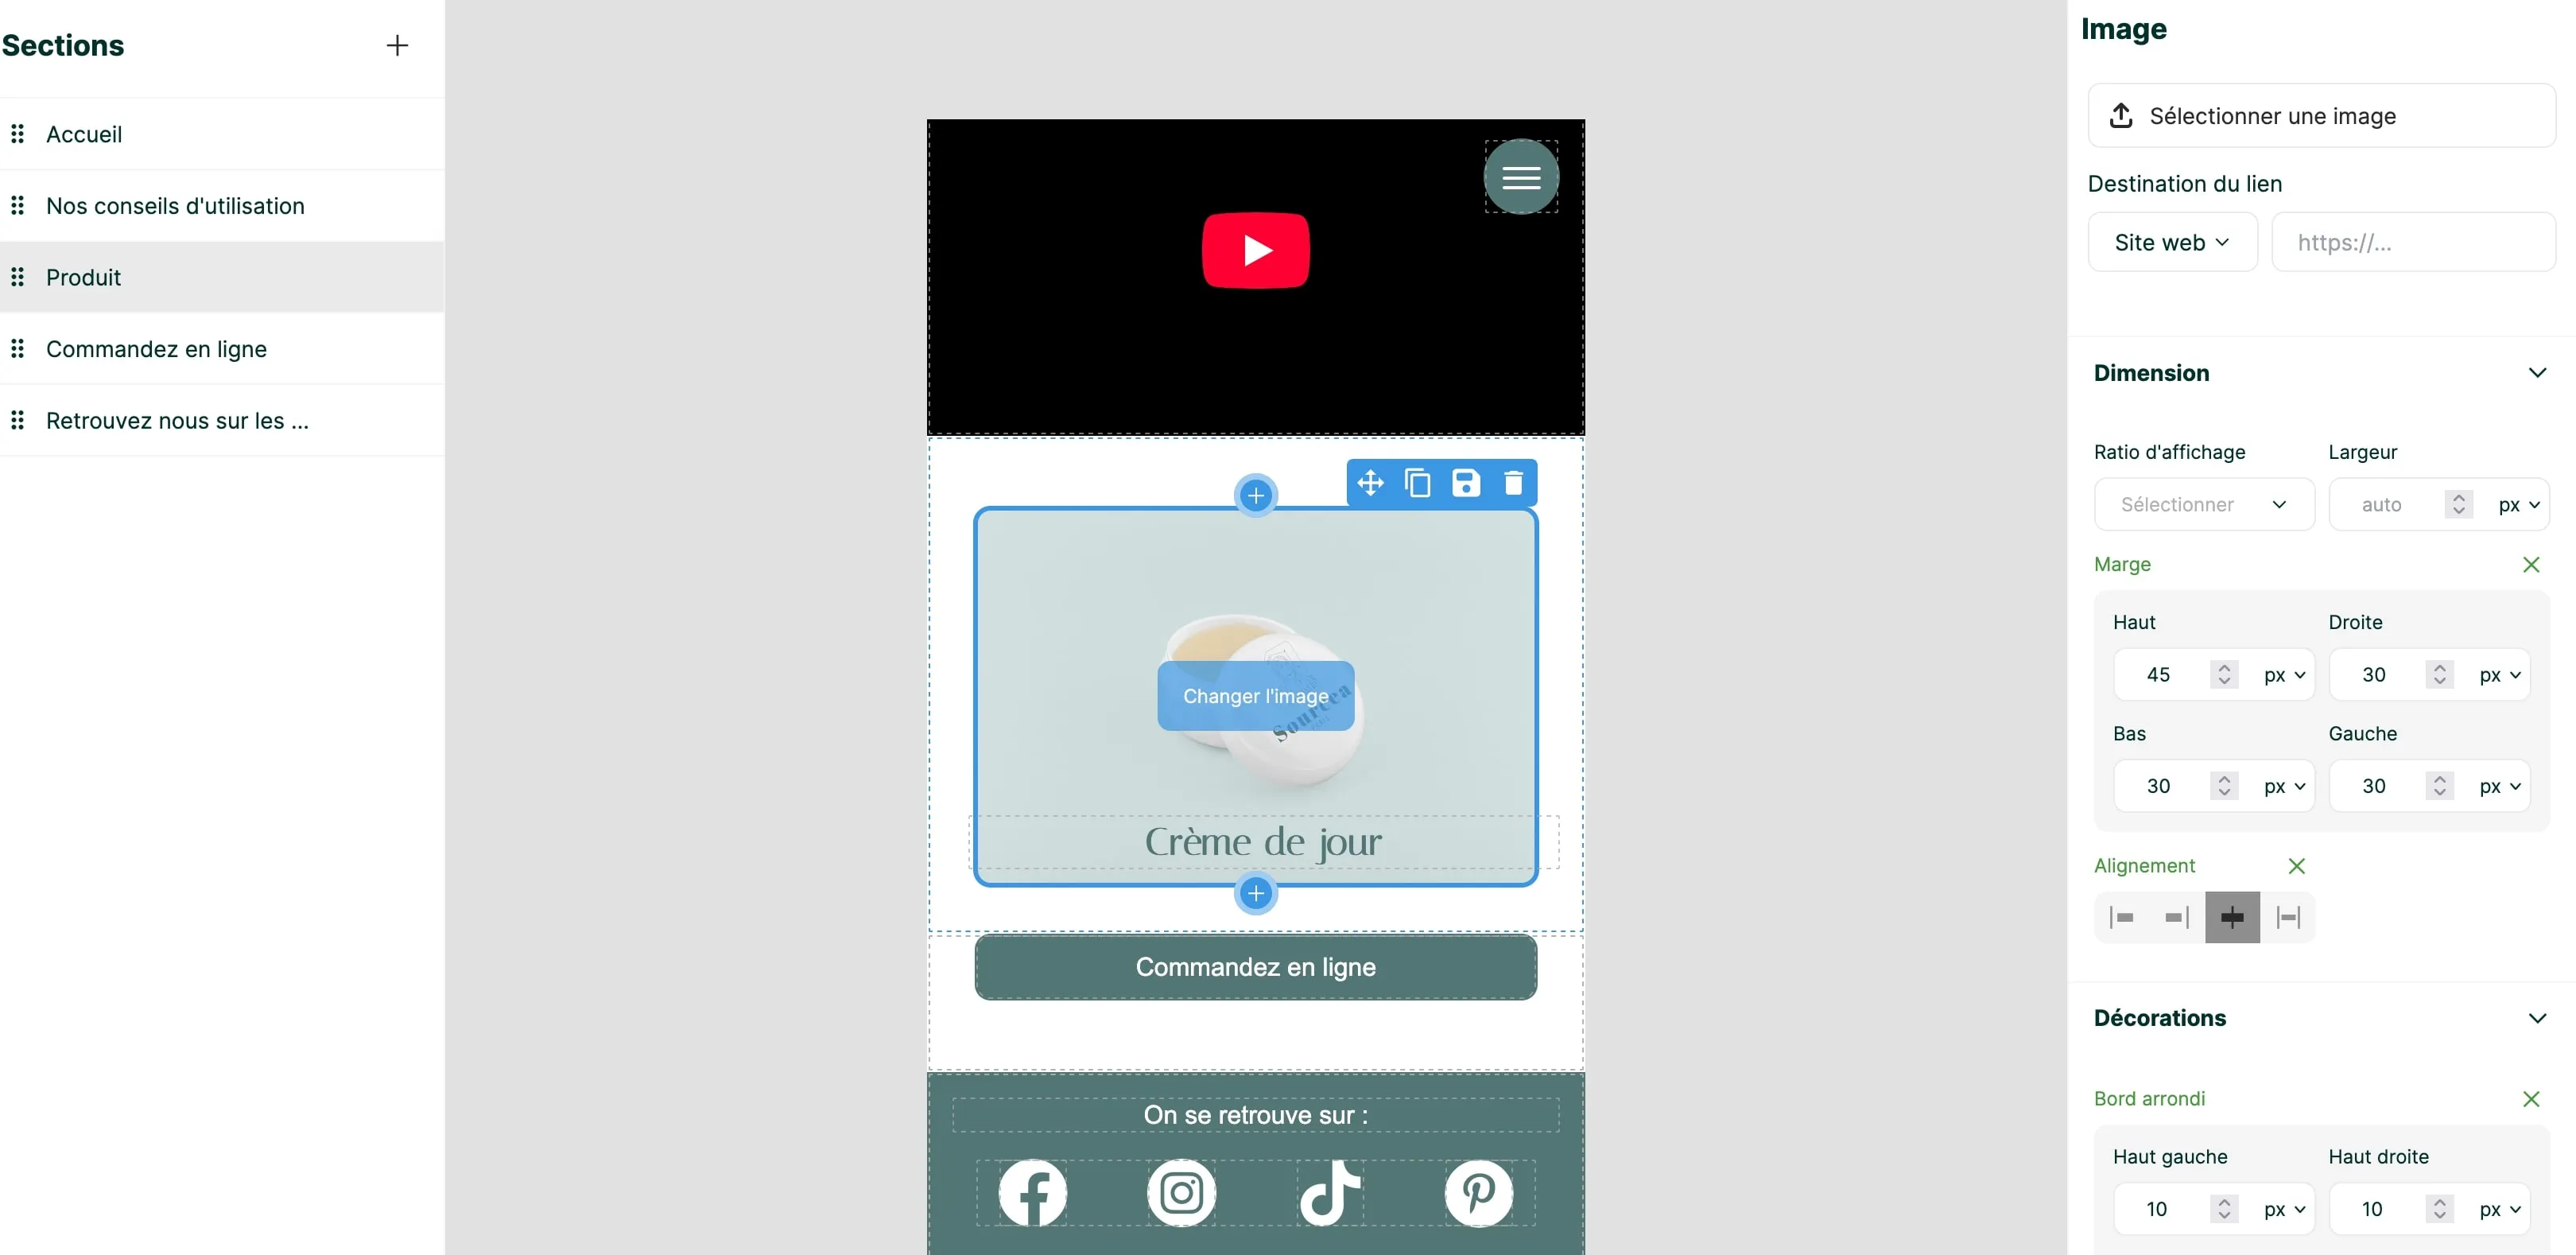
b. Individual customization of an element or section: To refine the style of a specific element or section beyond the global style:
- Select the element or section you want to customize in the main workspace.
- In the properties panel on the right, you can access its specific attributes and properties such as dimensions, typography, decoration, or section background color.
- Customize each property according to your design choices.
Explore all the possibilities to create a unique micro-website that aligns perfectly with your brand image.
Organizing and structuring your micro-website
Section titled “Organizing and structuring your micro-website”Why create different sections in a micro-website?
Section titled “Why create different sections in a micro-website?”Sections are modular content blocks that let you organize and highlight specific themes on the same page. They offer several key benefits:
- Thematic organization: Each section can bring together a set of elements such as text, images, videos, and buttons around a precise topic like “Our Benefits,” “Testimonials,” or “Contact.”
- Targeted navigation: You can create direct links to specific sections of your page from buttons, text blocks, or images, making it easier for visitors to navigate quickly.
- Visual customization: Sections can be styled individually through their properties in the right-hand panel, improving the overall design and readability of your page.
- Performance tracking: In the
"Statistics"tool, you can track the performance of each section, which is useful for measuring visitor engagement and optimizing your content. To learn more, see Using statistics for your micro-website.
How should I structure my micro-website by section and theme?
Section titled “How should I structure my micro-website by section and theme?”To build your micro-website in an effective and consistent way, we recommend working section by section and assigning a clear theme to each one. This can include themes such as "Home", "Product benefit", "Company story", "Event", "Promotional offer", "Know-how", or "Proof points".
Depending on your marketing goals, your micro-website can follow different structural approaches:
- Single-theme approach: One single theme is highlighted. This is ideal for very focused communication tied to your QR code’s call to action, a specific marketing focus such as a key benefit, a one-off event, a major news item, or even an urgent situation such as crisis management.
- Routing approach: Several choices are offered to the consumer through navigation components such as buttons. These links can lead to deeper internal pages or to external links.
- Multi-theme approach: The home page presents several sections, each covering a different theme.
Likewise, your micro-website strategy may favor a site dedicated either to a brand or to a specific product. See Should I create a product micro-website or a brand micro-website?.
Can I create multiple pages within my micro-website?
Section titled “Can I create multiple pages within my micro-website?”Yes, absolutely. Creating multiple pages inside your micro-website lets you explore certain themes in more depth and makes navigation easier for your visitors.
To add or manage your pages:
- Go to the left sidebar of the editor.
- Select the “Pages” panel.
- In that panel, you can:
- Add a new page
- Duplicate an existing page
- Select the page you want to work on
You can link your pages together and from the home page by creating links on elements such as buttons, text, or images. For more details, see How do I add links from an element and embed a video on my page?.
How do I return to my home page inside the editor?
Section titled “How do I return to my home page inside the editor?”To go back to your home page and work on it inside the editor:
- Go to the left sidebar.
- Click the “Pages” panel.
- In that panel, select the home page again, which is the first page listed by default.
- Then go back to the “Sections” panel to access and manage the sections specific to the home page.
Saving and pre-publication
Section titled “Saving and pre-publication”Do I need to save my micro-website regularly?
Section titled “Do I need to save my micro-website regularly?”No, it is not necessary to save your work manually every few minutes. QRanberi includes auto-save, which regularly saves all your changes so you can create with peace of mind.
If you prefer, you can still save manually at any time by clicking the save icon in the top-right navigation bar.
Can I save my micro-website as a draft?
Section titled “Can I save my micro-website as a draft?”Yes, absolutely. All your micro-websites are first saved as drafts as long as they are not linked to a distributed QR code or their URL has not been shared. Auto-save, and manual save if you prefer, ensure that your work is saved even if the site is not published.
Keeping a micro-website as a draft is useful for:
- Working at your own pace: You can edit it as much as you want without making it visible to the public.
- Creating foundations for other sites: A draft can serve as a model to generate other micro-websites through duplication. To do that, leave the editor and, in your
"Micro-websites"area, click the “Copy” icon under the preview of your micro-website.
Do I need to publish my micro-website?
Section titled “Do I need to publish my micro-website?”The publishing step is required for your micro-website to be accessible to the public. It uploads all your elements and makes the site viewable through either a QR code or a URL.
To publish your micro-website:
- Click the “Publish” icon in the top-right corner of the editor navigation bar.
- The tool will offer a preview of your site through either a temporary QR code or a direct browser preview.
Once published, your micro-website is ready. You can then:
- Connect it to an existing or new QR code in your QR code management area
- Share the micro-website URL directly. To copy that URL, leave the editor and find the
"Copy URL"option under your micro-website preview in the"Micro-websites"area
Is the publication QR code generated by the editor different from the QR code associated with my micro-website in the QR codes area?
Section titled “Is the publication QR code generated by the editor different from the QR code associated with my micro-website in the QR codes area?”Yes, absolutely. These two types of QR codes are different and serve distinct purposes:
- The preview QR code generated during publishing in the editor: This is a temporary preview QR code. It is only meant to let you quickly check the final rendering of your micro-website after publication before wider distribution. It is not tied to your marketing QR code management.
- The QR code associated with your micro-website in the
"QR Codes"area: This is the permanent production QR code that you create and configure in your dedicated QR code space. It is the code you will connect to your micro-website after publication and distribute to your customers. It is traceable and manageable.